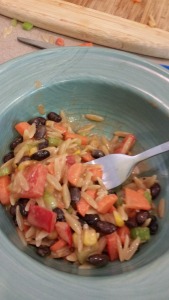
Purple Carrot Files: Italian Cannellini Bean Stew

I’ve been using Purple Carrot vegan meal planning/prep service on and off for about a year. While I like it, I don’t exactly love it. The cons are: tons of trash/recycling, expensive ($69.00 for 3 meals x 2 people OR 2 meals x 4 people), produce can be iffy upon arrival, produce doesn’t last long after delivery, some recipes are missing steps, instructions, ingredients or seasoning, there are lots of Asian & Thai flavors, and some meals seem suuuuuper cheap for what I pay for the box (like this one I’m profiling). The pros are: convenient, pre-measured, tasty and fun recipes I might not have otherwise tried, all the prep is done for you but the chopping (even in most cases the washing), lots of Asian & Thai flavors (yeah I listed that as a con too -but for me, I love these flavors), and finally, great customer support. Every single time I’ve emailed them, ranted on Twitter or tried to get a jab in on Instagram upset about a crappy piece of produce they have refunded me at minimum $20.00 and responded very promptly.

This last part is why I stick around: service. While it is not a perfect produce science. The service is friendly, prompt and honest. I’ve always been a big fan of a sincere apology, so I will take Thanksgiving off – they did a cool box donation to Feeding America, I fell for that noise and donated my meals to a charity this week and I’ll come back after the holiday in the hopes of more delicious Asian & Thai foods to combat my Thanksgiving sides hangover. Speaking of hangovers, food or otherwise, one of the recipes that I made this week struck me as being an excellent hangover cure: Italian Cannellini Bean Stew. 

This slideshow requires JavaScript.

Ingredients:

  • 2 cloves garlic, minced
  • 1 large shallot, minced
  • 6 ounces carrot, diced
  • 3 ounces escarole, deveined & chopped
  • 1 can Cannellini beans, rinsed
  • 1/4 tsp red pepper flakes
  • 3 T veggie broth powder
  • 3/4-1 tsp smoked paprika (I prefer Penzeys – especially because they are social justice badasses)
  • Fresh basil, chiffonade
  • 1/4 – 1/3 C vegan Parmesan
  • Olive oil (EVOO)

Directions:

Mince & dice: rinse & dry produce. Mince the peeled garlic and shallot. Peel and dice the carrots into uniform pieces.

Chop & rinse: rinse the escarole and basil. Separate the leaves from the thick/tough stems and discard the stems to both greens. Separately, stack the leaves of each green up, roll them and roughly chop them into ribbons (chiffonade). Drain and rinse the cannellini beans, set aside.

Start stewing: add 1 T EVOO to a stock pot and heat over medium high heat until hot. Add shallot, carrot, red pepper flakes and a bit of salt. Cook for about a minute stirring – careful not to burn the shallot. Add the garlic and saute until fragrant – 30 seconds to 1 minute – do not burn the garlic. Repeat: do not burn the garlic.

Finish stewing: add 4 C water, the veg powder and paprika to the pot. Scrape the bottom of the pot to dislodge any nummy bits from the bottom then add the beans. Bring the stew (stoup really) to a boil and reduce heat to low, simmer 10 minutes or until the carrots are tender (not mush). Add the escarole leaves to the pot, let wilt x about 2 minutes. Remove the pot from heat.

Garnish: season the stew with salt and pepper. Ladle into shallow bowls. Garnish with basil ribbons and vegan Parm.


Tried & True Thanksgiving Recipes That Will Impress Your Meat-Eating Friends

Thanksgiving is the ultimate potluck. Bring in the fam, everyone brings a dish or ten and you set in for the long haul on the twenty-course meal with more sides than you even knew existed. Being a vegan or vegetarian is feast or famine at a family gathering. You are constantly battling chicken broth in a lovely array of veg dishes. So if you haven’t yet trained your family on the perils of cream of chicken soup in the green bean casserole, head over to VeganGR for the top veganized comfort food recipes you can sneak into an omnivore gathering. Kolene and Jon have tried and tested nearly every recipe you can imagine and have settled down with these versions of comfort food, good even for your dad who thinks steak is a food group: VeganGR Thanksgiving Guide.

This weekend I got a little anxious for potatoes and gravy, so I tossed a Vegan Field Roast “Meat” Loaf slathered in BBQ sauce into the oven and served the Easy Mushroom Gravy over baked potatoes as the side. If you think that gravy needs animal fat to be delicious or that cooking the gravy with the threat of “breaking” of the gravy is part of the “art” of Thanksgiving, get out of town because this is the best gravy, meat-filled or otherwise you will put into your mouth. I dare you to swap it out for the main gravy at your holiday gathering…no one will notice a thing.

What little veg secret will you unleash at your holiday gathering? I’d love to hear about it. Make just 1 swap and tell me all about it.

This slideshow requires JavaScript.

Ingredients:

1 medium sized onion, roughly diced
8 oz cremini (baby bella) mushrooms roughly chopped
4 oz shiitake mushrooms, sliced (pictured is double cremini, no shiitake mushrooms at the grocery store last night)
1 T olive oil
¼ c canola oil
½ c all-purpose flour
2 cups good vegetable broth (I used Rapunzel broth powder)
1 t garlic powder (I subbed a Tablespoon of fresh garlic)
½ t thyme (dried)
½ t sage (I subbed 2 teaspoons of fresh sage for dried)
salt/pepper to taste

Directions:

  • Sauté onion and cremini mushrooms in saucepan along with the canola oil and a pinch of salt. Cook down until onions are translucent and the mushrooms have lost their moisture.
  • Add flour and stir until everything is covered and combined. You want no more white flour to be visible, and all the veggies covered in a thick paste. Let cook for a minute or so.
  • Add vegetable broth and stir. Bring back up to a boil and allow mixture to thicken. Once thickened, turn off heat and allow to cool for a few minutes.
  • While that’s cooling, add olive oil to a small frying pan on medium heat. Sauté shiitakes until they’re lightly browned. Remove from heat.
  • Take thickened sauce to a blender. Add in the thyme and sage, and process on high until smooth. Return to sauce pan, and turn heat back on.
  • Once hot, add shiitakes to gravy.
  • Serve + Revel in your plant-based trickery.

Tomatoes & Tarts

My friend Lesley and her family bought a farmhouse, so after one too many glasses of wine we decided to plant an epic vegetable garden – it was my responsibility to order the seeds and raise them to transplant size. About three hours and $300.00 later I had bought nearly everything resembling a tomato on the Baker Seed website. Now, we are swimming in tomatoes and zucchini of every heirloom variety under the sun.

Since the first full harvest of tomatoes netted over 20 pounds total and I didn’t really have enough to can but still too many to eat, I went in search of brunch recipes (to eat immediately) and preservation recipes (to eat later). I turned up many a tart and an old favorite recipe for what in my home we affectionately refer to as “crack tomatoes” which are perfect for winter TLT sandwiches when you’re say mid-February and there is no sign of spring in sight.

Crack Tomatoes

  • 2-4 C cherry, grape, pear or other smallish tomato, cut in halves (any tomato will work here really)
  • 1/4 cup extra-virgin olive oil
  • 1 tablespoon brown sugar (or maple syrup)
  • scant 1/2 teaspoon of salt

On jelly roll pan lined with foil or parchment (or glass dish – you will want to be sure you have sides) place tomato halves in a single layer, drizzle with EVOO, brown sugar (or maple syrup) and sea salt, let bake in a 400 degree oven until they have just begun to brown (you don’t want them crispy). Remove from oven, let cool and spoon into pint containers or freezer bags and freeze. If you put these in glass canning jars, you can easily remove the lid and rim and pop into the micro when you are ready to serve. The oil from the pan keeps them luxurious all winter in the deep freeze.

Tomato Tart

  • 1 recipe from scratch, or 1 refrigerated, or 1 frozen pie crust
  • 3 large heirloom tomatoes
  • 3 extra-large eggs
  • 1 – 4oz log goat cheese
  • salt & pepper to taste
  • fresh basil, torn into bits or ribbons

Pre-bake pie crust x 5-7 minutes until the space where the filling will end up is firm, almost has a crust formed (this will keep it from getting smushy). While crust is baking slice tomatoes about 1/4 inch wide, lay on paper town and blot with paper towel until most of the immediate moisture has been mopped up. Lightly beat eggs with salt and pepper (okay to use egg whites only here too), set aside. When pie crust is 1/2 done, pull from oven and pour eggs into crust, take goat cheese and drop by small chunks onto eggs, layer with overlapping tomato slices – place back into oven and cook at 400 until eggs are set (between 15-30 minutes). Let cool to room temperature and serve sprinkled with fresh basil.

This slideshow requires JavaScript.

Summer Salad – Roasted Corn & Blueberry

Summer is here! Shut up and eat your fruit and veggies! That is all.

20160723_174312

Salad ingredients:

  • 1 C blueberries, rinsed
  • 6-8 ears corn, roasted and cut off cob (or cut off cob and roasted)
  • 1/3 C red onion, diced finely
  • 1 English cucumber, peeled and quartered
  • 1 can chickpeas, rinsed and drained

Dressing ingredients:

  • 2 T EVOO
  • 2 T honey or agave
  • 1 tsp cumin
  • 1 tsp smoked paprika
  • juice of 6 small limes
  • 1/2 tsp red pepper flakes

Toss ingredients with dressing. Chill. Serve!

Amazing additions to this would be: jalapeno, cilantro, feta, goat cheese, cherry tomatoes! YUM.

Tomata Sammich

The first tomato of each season I dedicate to Gramma Helen and her love of tomata sammiches. Read more about this sandwich in a previous post.

Vegan Raspberry “Buttermilk” Cake

It’s mildly embarrassing to me that the raspberry bush that the “birds planted” in my yard does better than the one that I water and actually care for regularly. No matter, the birds dropped it in the perfect spot, my old garden box, so I get to benefit from their ingenuity I suppose in some form. The raspberries that humans planted were sparse, but large, red and delicious while the raspberries that the birds left us are small, black and a little more tart so I looked for a recipe where I could combine them to get the best of both worlds and I found it, in a cake on one of my fave websites The Smitten Kitchen. I veganized it and was good to go with what is now one of my favorite recipes for any berry. This recipe makes one thin 9-inch cake.

macro shot of raspberry cake from side angle

1 cup (130 grams) all-purpose flour
1/2 teaspoon (2 grams) baking powder
1/2 teaspoon (2 grams) baking soda
1/4 teaspoon salt
1/2 stick (56 grams) unsalted butter substitute, softened ( I used Earth Balance )
2/3 cup (146 grams) plus 1 1/2 tablespoons (22 grams) sugar, divided ( make sure it’s a vegan brand )
1/2 teaspoon pure vanilla extract
1/2 teaspoon finely grated lemon zest ( it’s optional but man does it take this to a new level of yum )
1 large (57 grams) vegan egg of choice, I used a flax egg
1/2 cup (118 ml) well-shaken buttermilk ( to make vegan buttermilk, I took 1T of white vinegar – you could also use lemon juice for this – and added it to 1/2C unsweetened Califia almond milk, let it set for a few minutes and then beat the crap out of it with a whisk – very technical, I know)
1 cup (5 ounces or 140 grams) fresh raspberries, I used a mix of red and black

Preheat oven to 400°F with rack in middle. “Butter” and flour a 9-inch round cake pan.

Whisk together flour, baking powder, baking soda, and salt and set aside. In a larger bowl, beat vegan butter and 2/3 cup (146 grams) sugar with an electric mixer at medium-high speed until pale and fluffy, then beat in vanilla and zest, if using. Add egg and beat well.

At low speed, mix in flour mixture in three batches, alternating with vegan buttermilk, beginning and ending with flour, and mixing until just combined. Spoon batter into cake pan, smoothing top. Be careful, make sure the middle is not more dense than the sides here or you will have a dry outside and too moist of a middle. Scatter raspberries evenly over top and sprinkle with remaining 1 1/2 tablespoons (22 grams) sugar.

Bake until cake is golden and a wooden pick inserted into center comes out clean, 20 to 25 minutes. Cool in pan 10 minutes, then turn out onto a rack and cool to warm, 10 to 15 minutes more. Invert onto a plate.

Raspberry Cake 2

Adapted from Gourmet, June 2009 and veganized from Smitten Kitchen


Vegan Maple Baked Beans

My grandma used to make baked beans that my dad would go gaga over. I personally thought they were disgusting. That may have been because they were probably born out of bacon fat renderings. So, you probably understand what I’m talking about. Of course, like most great family recipes they aren’t exactly written down. If someone doesn’t honor the family secret by being taught the family recipe, then it dies with the great inventor. Now, I didn’t like those beans particularly, but I am a fan of baked beans. I mean, what holiday would survive a lack of a delicious baked bean? Certainly not July 4th. While most baked beans have an animal fat as the star of the show, Oh She Glows took out the animal and added an extra dose of Canada via Maple Syrup (who doesn’t love a dose of Canadian PM Justin Trudeau?). I give you fresh from the Crockpot, Maple Baked Beans.

20160703_122440

  • 4.5 cups cooked navy or northern beans (approx. 3 (15-ounce) small cans -without liquid). In this picture I used 5C northern beans from the glass jars in the grocery.
  • 1 large sweet onion, diced
  • 3-4 tbsp blackstrap molasses
  • 3 tbsp maple syrup
  • 2 tablespoons regular mustard
  • 2 tablespoons apple cider vinegar
  • 8 oz/1 cup canned diced tomatoes without liquid
  • 1 teaspoon fine grain sea salt
  • Handful of dried cranberries or cherries

I dumped all of these items into the Crockpot. If you want a little sweeter onion flavor, brown the onions and let them reduce on the stove then add to the Crockpot. Don’t forget to rinse and drain your beans or good luck to you as you eat baked bean soup. I cooked these overnight on low and then for another 6 hours on high the following day to get a richer, thicker liquid. It didn’t burn or impact the bean texture much. I love how this recipe doesn’t call for ketchup or brown sugar. These flavors are so much more earthy and smoked.

Directions from original author – Slow-cooker method: Add cooked and drained beans into the slow cooker. Chop the onion and place the onion, molasses, maple syrup, mustard, vinegar, salt, tomatoes, and cranberries (optional) into the slow cooker and stir well. (Alternatively you can also cook these on the stove top or baked in the oven!). Cook over high heat for about 4-5 hours (however they can be eaten after just a couple hours of cooking), or cook them on the lowest heat setting for 7-8 hours. Make sure to check the beans frequently as I am not sure if this mixture will burn. After scooping into bowls, scoop on a bit of maple butter or drizzle pure maple syrup on top. Serves 3-4.

The things you can BBQ include pasta salad.

salad in green stoneware bowlWhile I was curating content at work last week  for a fitness client, I stumbled upon this blogger in Texas that LOVES BBQ. She had BBQ’d or had BBQ sauce on things I didn’t even know you should or could BBQ, including this pasta salad. So I made a few subs to this recipe to trim some sugar, but overall it was one of the most satisfying sides at our Memorial Day getaway. It could easily be a main dish if you add another protein or double the beans. This makes a shit ton of pasta salad, so if you think you are working with a big bowl, you should just size up. You can thank me later.


INGREDIENTS
16 ounces macaroni (I subbed orzo to avoid a trip to the store)
1 cup mayonnaise (I subbed vegan just mayo)
½ cup Stubbs Original Barbecue Sauce (I subbed for Sweet Baby Ray’s regular)
¾ cup Stubbs Spicy Barbecue Sauce (I subbed for Sweet Baby Ray’s spicy)
1½ teaspoons cider vinegar (I subbed white balsamic vinegar)
½ teaspoon cumin (I doubled)
¼ teaspoon smoked paprika (I doubled)
¼ cup sugar (I eliminated altogether – if you wanna add sweetness, try something like maple syrup – yum!)
2 cups corn (I blackened it over the stove quick from frozen)
2 cups black beans (if canned, be sure to drain them)
¾ cup diced onion (I eliminated for onion flavor, I subbed for 1/2 teaspoon onion powder)
½ cup diced green bell pepper (I eliminated)
½ cup diced yellow bell pepper
½ cup diced orange bell pepper
½ cup diced celery (I doubled)
¼ cup diced, roasted poblano pepper, optional (we subbed ancho chili powder 1/2 teaspoon)

The directions are simple. Cook the pasta, rinse, rinse, rinse. Add sauce ingredients to a bowl and whisk (bbq sauce, mayo, vinegar, all spices), then add all the components to the sauce. Pop in the fridge. The Restless Chipotle says store in fridge over night and eat the next day. I shoved it right in my pie hole as soon as I assembled, but noticed it did get better with age.

Original from: http://www.restlesschipotle.com/bbq-macaroni-salad/

Melissa’s To The Rescue

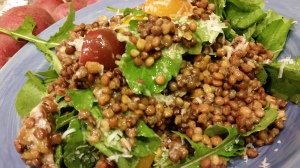
Sometimes you have a lot of great ingredients on hand but lack the imagination to put them all together in order to make sense in your tummy. Tonight was one of those nights. Beautiful tomatoes and arugula from our CSA, an abundance of lemons from a 10 for $10 sale a few weeks ago (just about to go bad), and a package of Melissa’s Steamed Lentils with an expiration date fast approaching.  As I was turning the lentils over in my hand, a recipe conveniently placed on the back of the box told me time to make a salad!

20150826_194313

Dressing

  • 6 lemons, juiced
  • Zest of 3 of those lemons
  • 2 cloves garlic diced
  • 1/3 C extra virgin olive oil

Put all ingredients into a mason jar and shake what your mama gave ya.

Salad

  • 2-4 C arugula
  • 2 handfuls of cherry tomatoes, halved
  • 1 package Melissa’s steamed lentils or any other grain or bean of your choosing

20150826_194621

To make salad, toss arugula, tomatoes and lentils in a bowl with zesty lemon dressing, eat cold or at room temperature.

6 Essential Items: Prep Your Kitchen for the CSA Season

Vegans and vegetarians rejoice, Michigan growing season is here. It’s time to binge on sweet corn, greens, tomatoes, blueberries, fresh herbs and finish up that root cellar supply to make way for the best season in our eating culture. By this time in the summer, following what seems to be the longest potato and squash winter ever, I’m ready for just about anything that hasn’t been on a shelf or procured from my local grocer. Conversely, I know what my first CSA greens season looked like, felt like and tasted like which was overwhelming on all accounts. For example a pound of greens doesn’t SEEM like a lot until you get it home, have to process it and store it so as not to have just one day of fresh but rather, stretching the fresh to a week or so. This idea is tougher than it seems. So what do you need in your kitchen to be successful during a CSA season? Here are a few things Mr. Wonderful and I cannot live without:

1. Salad spinners (yes, plural): we use 3. One that holds plain greens that are ready to eat, one that is always either in the sink or at the ready on the dish rack, and one that is usually holding a salad prepped for dinner that night or for a quick lunch – dressing on the bottom (built like those mason jar salads) so a quick toss and I have a meal.

2. Quality Santoku knife: we bought ours off Amazon for $10.00. I was ready to spend upwards of $100.00 for a specific brand, but surprisingly the highest reviewed one at the time cost just $10.00 (it’s $11.00 now), with a “midrange” nicely reviewed model at around $36.00 for a name you might recognize. Regardless of your budget there is a knife out there you can afford. Keep it sharp, don’t run it through your dishwasher (hand wash that thing) and it should last for years. Sharp is important when dicing spring onions and herbs so you don’t bruise them which leads to yucky discoloration.

3.  A “go-to” veggie cookbook: My newest obsession is this book by Terri Hope Romero, co-author of Veginomicon which is a veg cult classic, her newest, Salad Samuri has a fun title and has breathtaking photos (hello, you need photos in a cookbook, right?). The dressing section alone is worth the purchase. Another one I love a lot is the Oh, She Glows Cookbook. Angela Liddon also runs a killer blog that a CSA blogger friend of me also loves, so bow to the peer pressure of your CSA members and get on board the veggie train.

4. Ice cube trays: What better way to freeze single-serving broth cubes, herbs before they go bad, and pesto when basil season is upon us? An ice cube tray of course! This model is particularly cool because it has a lid to keep your freezer and everything in it from smelling like garlic (I mean some people don’t like that). The single servings pop out easy and you can drop them immediately into a pot of freshly cooked and drained pasta or start a soup with them. My fave hack is to drop herbs into the individual compartments cover with a little olive oil and water then when I need it for a saute or something I just drop it in a hot saute pan let the water evaporate and then add the other ingredients for my meal.

5. Green bags: Don’t let the “as seen on TV” label scare the crap out of you. These things work. Enough said, go buy some. They carry them at most Meijer stores locally too. They are, dare I say it, magical.

6. Veggie wash: While the veggies at the Blandford CSA are some of the cleanest I’ve ever come across in a CSA upon pick up. Read the dirty truth about veggies here: the top 10 fruit/veg offenders. Well get those veggies sparkling in a nontoxic way with this quick spray by Honest Company followed by an earnest cool water rinse. I’ve found this brand at Target recently but Amazon has a better price. Feeling a little more salt of the Earth? I’ve used a concoction of 50% white vinegar and 50% water in a spray bottle in a pinch. Be sure to rinse well under both accounts as the spray and vinegar both have a lingering smell.

What are your go-to kitchen hacks for surviving CSA season? Let me know what I’m missing out on below.

A version of this blog post first appeared on the Blandford Farm CSA Blog

Vegan, Gluten-Free Gooey Pumpkin Spice Latte Chocolate Pudding Cake [say that three times fast]

I haven’t posted in a while and for that I’m sorry. Posts likely won’t pick up until the first part of January as I finish up my PhD coursework and become the coveted “ABD” (all but dissertation) in the next hurdle for terminal degree conclusion.

I know I talk about my amazing Pinterest experiences [and my not so amazing ones too] and my pinning addiction too much as it is, but think of all of the amazing content it creates in life! It’s become a break, a relaxation technique right before bedtime, I pin all sorts of fabu stuff that I may or may not ever act on; however, this recipe from Angela Liddon, I made within 24 hours of pinning and I am NOT sorry. In fact, I have plans to make it for just about every potluck I will be attending in the next 4 weeks or so; my apologies [sorry, not sorry] if I will see you multiples times in the next month – I don’t think you will mind much as this dish is certainly worth grabbing seconds of – for sure.

I’ll STFU now and give you some food porn and a recipe. If you aren’t paying attention to Oh She Glows, you are missing out on some seriously tasty vegan eats. Cheers!

Ingredients:

  • 1.5 cups rolled oats, ground into a flour (use certified gluten-free oats, if necessary)
  • 1 flax egg: (1 tablespoon ground flax mixed with 3 tablespoons water)
  • 3/4 cup coconut sugar – I used cane sugar with fine results
  • 1/3 cup unsweetened cocoa powder – don’t skimp on quality here – I used very dark and it was rich and gooey
  • 1 teaspoon cinnamon
  • 1/2 teaspoon ground ginger
  • 1/8 teaspoon fresh ground nutmeg
  • 1/3 cup finely chopped non-dairy dark chocolate
  • 1/2-3/4 teaspoon fine grain sea salt, to taste
  • 1/2 tablespoon baking powder
  • 1/2 cup + 2 tablespoons almond milk
  • 1/2 cup + 2 tablespoons unsweetened pumpkin puree
  • 1/2 tablespoon pure vanilla extract
  • 1 tablespoon cocoa powder
  • 1/4 cup coconut sugar
  • 1 + 1/4 cup hot coffee – I used Biggby Cinnamon Toffee seasonal flavor and I was not sorry
  • For serving: vegan vanilla ice cream and toasted chopped pecans


This slideshow requires JavaScript.

Directions:

  1. Preheat oven to 375⁰F and lightly grease an 8-inch square glass baking dish with oil.
  2. Whisk flax and water together in a small bowl and set aside for 5 minutes to gel up.
  3. In a large bowl, stir together the oat flour, 3/4 cup sugar, 1/3 cup cocoa powder, cinnamon, ginger, nutmeg, chocolate, salt, and baking powder.
  4. In a small bowl, whisk together the flax mixture, milk, pumpkin, and vanilla.
  5. Pour wet mixture onto dry ingredients and stir until thoroughly combined.
  6. Scoop the batter into the prepared glass dish and smooth out evenly with a spoon.
  7. In a small bowl or mug, combine the remaining tablespoon of cocoa powder and 1/4 cup sugar. Sprinkle all of it evenly over the cake batter.
  8. Slowly pour the hot coffee over the cocoa powder and sugar mixture ensuring that the coffee completely covers the powder and sugar. The cake will now look like a complete disaster, but this is normal. Promise! It’s true. It’s not pretty.
  9. Very carefully place the dish into the oven, uncovered. Bake at 375⁰F for 24-30 minutes (I baked for 24 mins., but your oven might need more or less – see her post for the visual step by step pictures) until the cake is semi-firm on the top, but bubbly and gooey around the edges. It will look under-baked, but this is normal. If for whatever reason your cake is still watery after 30 minutes in the oven, keep baking it until the rapture. I’m just kidding. You will want to pull it out before it burns for sure.
  10. Let the cake cool for 10 minutes and then serve immediately with vegan vanilla ice cream and toasted pecans. This cake is best served warm straight out of the oven. Eat this….all of this immediately. Chef Mike topped ours with fresh whipped cream. It made me very happy.

Notes from Angela: 1) You can probably swap the coconut sugar for natural cane sugar. The bake time may vary slightly since coconut sugar tends to be more dry. 2) If you aren’t a coffee fan, feel free to swap it with boiling water. 3) To make this nut-free, swap the almond milk for coconut milk (or non-dairy milk of your choice) and leave out the pecan garnish. 4) To make the oat flour, add the rolled oats into a high speed blender and blend on high until a fine flour forms. You can also use 1 1/2 cups + 2 tablespoons store-bought oat flour instead.


How Pinteresting…Vegan Flourless Chocolate Muffins

Pinterest claimed another one of my hunger pangs and forced me to make these vegan flourless chocolate muffins last weekend. I’m a little on the fence about them. While they were shared over 7K times online and pinned and repinned who knows how many more, I’m not totally convinced these muffins, while healthier than most, are worth the cals they pack (315 per muffin – omg). The texture is unique, more dense than breadlike (obviously, no flour) they do have a gooey brownie-like quality that makes them have a velvety mouth feel.

I do think these would be a great food to have pre-workout or on a marathon route somewhere in the middle to end as they contain many lovely natural sugars for energy, potassium from the bananas for your tired muscles,  and probably some health benefit from the cocoa (maybe caffeine or additional stimulant). They are dense, filling, and easy on the stomach. This is a pretty low-investment experiment. I had all of these items lying around my house, so give them a try for yourself. They take a matter of a few minutes to whip up in your food processor and just a few minutes in the oven. I added a generous pinch of salt after I tasted the batter as the recipe was a little bland as written. Report back what you think, I’d be curious to know.

Ingredient

  • 1 cup creamy peanut butter (or nut butter of choice)
  • 2 very ripe bananas
  • 1/4 cup maple syrup
  • 1/3 cup cocoa powder
  • Generous pinch of sea salt

This slideshow requires JavaScript.

Pre-heat oven to 350.
In a food processor combine all ingredients. You may have to stop and scrape down the sides a few times.
Once everything is mixed well, spoon batter into lined muffin cups. If using papers you might want to lightly spray the bottoms to avoid sticking. The batter will be VERY sticky. I found wetting a spoon kept it from sticking.
I topped a few of mine with a pinch of sea salt.
Place muffin pan in the oven and bake for about 15 minutes.
Wait until these are completely cooled before removing from the pan. When the timer goes off they will not look cooked, trust the recipe and pull them so you don’t try them out.  My recipe made 8.


Vegan Curried Sweet Potato and Corn Chowder

The last call for summer corn is upon us in Michigan. My favorite time of late summer/early fall is the week or two in which Honeycrisp apples overlap sweet summer corn harvest. Today from Versluis Farm I picked up 16 ears of corn, a half bushel of the last of the Ginger Gold apples, a half bushel of the first Honeycrisp apples, a few of the remaining plums and a few pints of white peaches. This time of year makes me a little sad…squash season will be upon us at anytime which means, more butternut, spaghetti, acorn and buttercup flesh than I can stand to consume frankly. I hope to make a few more grabs at the apples before they disappear and savor the sweets of summer.

To make the best use of corn today, I stripped it from the cob and created this soup to freeze for when I get all squashed out this winter. Savor summer friends, it is disappearing before our very eyes.

  • 2 large sweet potatoes, diced
  • 1 large red bell pepper, diced
  • 1 large green bell pepper, diced
  • 1 jalapeno pepper, diced
  • 1 poblano pepper, diced
  • 8 ears corn, stripped of kernels (save cobs for broth)
  • 1 red onion, diced
  • 3 shallots, diced
  • 1 T garlic, chopped
  • 2 tsp ground cumin
  • 2 tsp powdered onion
  • 2 tsp powdered garlic
  • 2 tsp – 1 1/2 T hot curry powder
  • 2 tsp black pepper, ground
  • 1 tsp sea salt
  • 3 bay leaves
  • 1 can full-fat coconut milk (approx 11-15 ounces depending on brand)
  • 6-8 C water
  • 3 T powdered bullion (I use Rapunzel brand)
  • 1-2 T extra virgin olive oil
  • juice and zest of 1 lime

corn

Instructions:

In a dutch oven, saute in extra virgin olive oil red bell pepper, green bell pepper, jalapeno pepper, poblano pepper, red onion, shallots, and garlic. Add corn after veggies are cooked through and cook together for one minute. To the veggies add spices, bullion, water and corn cobs stripped of kernels – the remaining starch helps thicken the soup. Simmer soup for 30-60 minutes then remove cobs and add full-fat coconut milk, lime juice and zest, stir. Before serving, do one of two things: use immersion blender to achieve additional thickness or transfer half of soup to food processor or blender until desired consistency is met. If you like a thicker chowder, consider using part mashed sweet potato and part diced. Serve with naan or any other carb. Freezes well.

Let’s Talk Turkey: F*CK Factory Farming

Since the data says that 97% of people are against cruelty to animals, it’s time for a reality check folks. I don’t like to push politics and policy on this blog much, but the reality of it is factory farming is fricking terrible. It’s bad for the environment, it’s bad for the quality of food that omnivores consume and it’s effing terrible for the ANIMALS on the farms. Most people don’t realize that there are no federal laws protecting farm animals from cruelty while they are housed on a farm or during transport to slaughter. There are limited protections for cows and pigs at slaughter that are inconsistently enforced and no protections for chickens or turkeys. Factory farms—which raise and slaughter billions of farm animals each year—view animals as cheap commodities rather than as individuals with their own needs and feelings. The cruelty inflicted by factory farms on these helpless animals is unconscionably brutal and would be considered a felony if cats or dogs were the victims.

To raise awareness and a few bucks for the Farm Sanctuary’s amazing mission and work, in October I’m walking with Team Vegan GR in the Farm Sanctuary Walk for Farm Animals to give animals a voice and to challenge the cruel practices of the factory farming industry. Please support my participation in the Walk for Farm Animals by making a donation today!

For more than 25 years, Farm Sanctuary has relied on the Walk for Farm Animals to support its life-saving mission to protect farm animals from cruelty, inspire change in the way society views and treats farm animals, and promote compassion. For more information about Farm Sanctuary, please visit their web site: www.farmsanctuary.org.

Need additional inspiration? Education? A kick in the ass? Let’s talk turkeys: 

Turkeys raised for human consumption are crowded into poorly ventilated industrial production facilities, sometimes with as many as 10,000 birds packed into a single factory building. In 2007, 265 million of these naturally explorative and socially sophisticated birds were slaughtered in the United States. Bred to grow alarmingly faster than their wild counterparts, turkeys suffer from numerous health complications, including heart disease and painful leg disorders.

turkey factory farm

  • Due to selective breeding, commercial male turkeys rapidly grow to a weight 3 times larger than wild male turkeys in only 4 months. Rapid growth and resulting heavy body weight can lead to heart problems and painful leg issues, which can eventually lead to crippling.
  • Male turkeys are bred to develop such large breasts that they can no longer mount females to reproduce naturally. Artificial insemination managed by humans is responsible for all reproduction in domesticated turkeys.
  • Turkeys may be confined so tightly that each bird has only between 2.5 to 4 square feet of space each. This space only gets tighter as the turkeys grow larger.
  • The dusty, ammonia-filled air inside these facilities is a consequence of poor ventilation and overcrowding. This highly contaminated air is associated with a host of health issues, including respiratory damage and irritated, swollen eyes.
  • Because a single worker may be responsible for the care of as many as 30,000 birds, these and other illnesses and injuries can easily go unnoticed.
  • Crowding at this level can cause turkeys to injure each other with sharp beaks and toes — a concern to producers because it damages the flesh — so turkeys often have portions of their beaks and toes removed at a young age. Turkeys are routinely debeaked, a painful process in which part of the sensitive, nerve-filled beak is removed using a hot blade, shears, or a high-voltage electrical current. It is also a practice for turkeys to have a portion of their toes removed with surgical shears. Each mutilation is done without pain reliever or anesthetic of any kind.

turkey poults on factory farm

  • Once they reach market weight — on average, 99 days for hens and 136 days for toms — turkeys are thrust into crates and transported to slaughter. Severe injuries, such as dislocated hips and wing fractures, have been reported as a result of rough handling during crating.
  • Transport may involve travel over long distances, subjecting turkeys to unfamiliar noises, motion, and extreme temperatures. These stresses, coupled with the deprivation of food and water during transport, contribute to the hundreds of thousands of turkeys who die before they even reach slaughter.
  • Following a stressful transport, turkeys arrive at the slaughterhouse. Although the Humane Methods of Slaughter Act requires animals to be rendered insensible before shackling and slaughter, the USDA does not interpret this law to include birds killed for food, and it does not protect turkeys

So WTF are you waiting for? Support me in my walk to educate the public about these egregious abuses and support legislation to end them.  Gobble, gobble. That’s “thank you” in turkey.

Raw, Vegan Peanut Butter Cookies with Sea Salt

You know by now my love affair with Pinterest. This recipe has been pinned for a bit on my Eat board and was long past time to try it. I dare say, you should go check out A House in The Hills blog where this post originated, blogger Sarah has lots of interesting things going on over there.

We have a bit of a peanut butter problem in our home, this hits the spot and is fairly healthy. Also, it doesn’t require you to turn on the oven and in the summer that’s critical in our home. Get your peanut butter cookie fix here:

  • 1 cup of raw almonds – I had 3/4 cup raw almonds in the pantry and supplemented them with 1/4 raw cashews
  • 1/2 cup of peanut butter – I used unsalted, chunky here
  • 1 cup pitted Medjool dates
  • 1 1/4 teaspoons of vanilla extract
  • sea salt to garnish

This slideshow requires JavaScript.

Combine raw nuts, peanut butter, dates and vanilla in your food processor or high power blender until a doughy texture comes together. Sarah recommend that you add more peanut butter if the dough is not sticking together properly. Remember you aren’t baking these babies, so it’s super important that they stick together! After you get the consistency you are striving for form into small balls and use a fork to create the traditional criss-cross mark on top of a baked cookie. Sprinkle with sea salt if you like. Although, I can see where a few chocolate chips might not be such a bad idea here either!

Store these in your fridge or freezer well packaged. Sarah from A House in the Hills says they are better the next day, but I am not sure mine have a shelf life of “the next day.”

Marinated Asian Tofu

I have a pantry full of delish Asian ingredients which I use to make varied marinades, dressings, etc. You would be shocked how great chickpea miso, oil, vinegar and some Sriracha sauce are as a salad dressing in a pinch. The ingredients are flexible, tasty and many of them vegan. This weekend we got together with Chef Dewicki and Andrea which means amazing food shall be had and this time was no exception. I opted to use all ingredients from my house, meaning no trips to the grocery store which challenges me in a very, very good way. Taking a cue from a recipe I’ve been eyeballing over on Pinterest, here is a marinated tofu recipe that I dropped atop peanut noodles and then added grilled veggies and roasted Urban Mushroom CSA goodies from their last delivery for a quick pasta salad.

This slideshow requires JavaScript.

Marinade:

  • 1 tsp Ume plum vinegar
  • 3-4 T low sodium soy sauce
  • 1 tsp rice wine
  • 1 glug maple syrup, use agave or other favored sweetener here if you want
  • 1 T nonflavored oil, I used canola
  • 1 T chopped garlic
  • 1/2 tsp powdered ginger
  • 1 tsp roasted sesame oil
  • 1 1/2 tsp Sriracha
  • 1 tsp water

Whisk all ingredients together in a medium bowl. Drop in your pieces of tofu or tempeh, let soak for about 20 minutes, turning once at 10 minutes to cover all pieces. As I was roasting mushrooms anyway, I put the tofu pieces on a foil-covered roasting pan in the oven with the excess sauce at 375 for about 40 minutes. You want it firm and cooked, all marinade soaked up, but not dry. So keep an eye on it. I cut up my barely pressed tofu into matchsticks so they roasted pretty quickly. This method yields pretty concentrated flavor in the tofu, so go easy on the seasonings of the salad, wrap, pita or pasta you drop it on as you don’t want to make a salty mistake.

**Roasted mushroom images here to make you a little jealous. Although they would taste super yummy in the marinade too.

Maple Mustard Dressing

image

Quick post here. I know it has been tooooooo long and I am reallllly sorry. This will make things better.

Maple mustard dressing came to life when Mr. Wonderful said “can we do mustard dressing?” Yes…yes we can. Here’s how:

Very scientific in measurements 😉
Makes about 1/2 cup

1 glug extra virgin olive oil
2 glugs maple syrup
1-2 glugs balsamic vinegar
3 big squeezes of your fave mustard
Water to get to your favorite consistency
Salt and pepper to taste

Whisk all ingredients together in a small bowl. Whisk in water until you reach that ideal consistency. Pour on that lovely salad or use to dip stuff in. I feel like this would be amazing on potato salad. Happy summer salad days.

Cold Killer

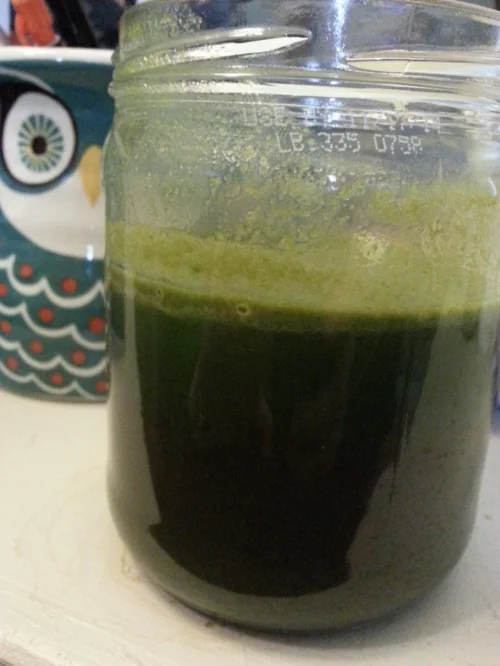
I juice a few times a week. I think it is super fantastic. I actually crave kale and carrot juices sometimes, I realize this makes me a little on the odd side. I work with college students every week day in some capacity as mentor, professor, intern boss-lady, and boy-oh-boy do are they every germ-riddled. They eat like shit, never sleep, and basically act as petri dishes for cold cultures. I’m getting that spring drainage, sore throat, not sure if it is a cold or allergies or what right now and frankly who has time to be sick? So I thought I’d beat the may be cold into submission with a extra dose of vitamin C from juice, surely better than those powdered packets they sell at the drug store right? Hey, anything is worth a try. Here is what I gathered from the fridge for a yummy cold killer and soon to be be beach cocktail base (just add vodka). Cheers!

This slideshow requires JavaScript.

  • 3-4 inches fresh ginger, peeled
  • 8 minnolas, or other orange available, peeled (make ’em sweet-the rest of the ingredients are super tart)
  • 4 limes, peeled

Run through your trusty Breville juicer. Drink up! I drank a glass and froze the rest into cubes for “dosing” through the week.

Damn You Pinterest

Dear Pinterest,

You are an amazing resource for Vegan/Vegetarian inspiration; however, you are also a time suck. I login to your beautiful user interface bright with photos, inspiration, and photogenic love for a quick recipe and then I emerge 2-4 hours later in a fever wondering what in the hell happened to the last few hours of life.

I do use your helpful advice on how to remove blackheads naturally, and how to hack a mason jar into a dozen beautiful [and helpful] household uses. I absolutely appreciate you showing me stuff to make in my “spare time” whenever I manage to get some of that, giving me ridiculously easy fitness moves I could pull off at home [because you know summer beach bodies are built in the winter], in providing me with “fun and simple” easy-to-sew patterns of clothes I will never be able to make but desperately want to in order to appear “free and breezy” like that romantic tulle skirt you keep teasing me with in my feed, and lastly, the recipes...oh, the recipes. Your communities of recipes suck me in every single time.

This weekend I had something to show for it however, Vegan ‘Caramel’ Truffles [sadly sometimes I do not]. Thank you for loving photos of great vegan eats as much as I do, but damn you for making it so pretty and so helpful to a curious person like myself that I find it difficult to leave. You do relax my mind and that is worth at least $105.00 per hour according to my therapist bill.

Fondly,

Adrienne

This slideshow requires JavaScript.

Vegan Sriracha Maple Glazed Veggies

This slideshow requires JavaScript.

I totally missed the boat on posting Thanksgiving recipes this year-don’t judge me. Luckily this recipe isn’t just a “holiday” recipe so I can share with you now. It will warm you up from the inside out AND it’s a sneaky way to make veggies that sometimes get a bad rap, like brussels sprouts, into the belly of an unsuspecting friend with favorable results. I think this could be slathered on just about anything but for this recipe I chose sweet potatoes, raw cranberries (go with it okay), and brussels sprouts – I think any roasted veggie would do though, so experiment with whatever is in your pantry already.

  • 1/2 C maple syrup
  • 3T EVOO (about 1T per cup of veggies roasting)
  • 3T Sriracha
  • 1 1/2 T Braggs Aminos (or low sodium Tamari/soy sauce)
  • 1T chopped garlic
  • 1T minced fresh ginger
  • juice and zest of 1 lime

Whisk all ingredients in a small bowl and dump over veggies in a roasting pan. Roast at 400, turning every 15 minutes, until veggies are slightly charred and glazed. Serve. Put leftovers over rice or in a tortilla the next day for a quick lunch.

Recipe adapted from Baker by Nature and Pocket Full of Thyme

Simple Chocolate Vegan Ganache

Don’t let your cupcakes go naked, or worse…be slathered in store bought frosting. Use your microwave to whip up a simple tasty vegan ganache. Paired with the best vegan chocolate cupcakes or drizzled you will ever eat or maybe even on PANCAKES, you will wonder why you ever shopped for frosting in the grocery store.

  • 1/2 C vegan semi-sweet chocolate chips
  • 1/2 C nondairy milk of choice (I used almond milk)
  • 2 T sweetener of choice (I used maple syrup)
  • Add-in’s: 1 T cinnamon and/or 1 T espresso powder

Directions: In a microwave safe measuring cup, combine all ingredients except add-in’s. Microwave in increments of 20-30 seconds, until chocolate chips melt. Whisk chocolate chip mixture together until smooth and velvety, then whisk in your desired add-in’s. Refrigerate to set up. When thickened drizzle over cake of choice. I love this recipe best: Vegan Chocolate Cake.

This slideshow requires JavaScript.

Crock Pot Vegan: Sweet Potato, Kale, and Chickpea Soup

And….we’re back! After a few weeks off for bad behavior and a new ACL, I’m glad to be back. I’ve had my eye on this recipe for a few weeks now. It is sweet, savory, smooth and lumpy (in the best chickpea way). It’s sure to keep you full and warm when battling the winter chills. The original recipe calls for farro from Cookie + Kate but since I didn’t have any handy, I grabbed some wheat berries instead which I cooked first on the stove and added toward the end. 


Ingredients
  • 1 large yellow onion, chopped
  • 2 small to medium sweet potatoes, peeled and diced (or butternut squash)-I used a mix of both as I had some cubes frozen from fall.
  • Salt, to taste
  • 2-3 T red Thai curry paste (available in the Asian section at most grocery stores-check to be sure no anchovies or shrimp were sacrificed for your paste)
  • 1 C uncooked farro, rinsed (or 2 C cooked whole grains, like wheat berries, spelt berries or kamut)
  • 6 C vegetable broth (or water flavored with vegetarian bouillon cubes)
  • 1 C coconut milk (from a can-okay to use light)
  • 2 C cooked chickpeas (or one can of cooked chickpeas, rinsed and drained)
  • 1/2 red pepper, finely chopped
  • 1 small bunch of crinkly purple kale or green kale, finely chopped
  • Sriracha to taste, I dropped in 1T
Instructions for crock pot:
Chop and dump. Simple as that. Omit the cooked wheat berries and chickpeas until about an hour before you are going to serve then pop them in the cooker to warm up with the rest of the items. My soup took 6.5 hours in a large crock pot. I used the last hour to add the wheatberries and chickpeas.
Instructions for stove top from Cookie + Kate:
  1. In a large soup pot, heat the oil over medium-high heat.
  2. Stir in the onions, raw sweet red pepper, and sweet potato and a big pinch of salt. Sauté for five minutes, stirring occasionally, until the onions start to soften.
  3. Add the curry paste and stir until the onions and sweet potatoes are coated and the curry is fragrant (about a minute).
  4. Add the farro, if that’s your grain of choice, and six cups of veggie broth or water and bouillon cubes and the coconut milk.
  5. Bring to a boil, then set the timer for thirty minutes, cover the pot and reduce the heat to a simmer.
  6. After thirty minutes, uncover the pot and add the chickpeas. Taste and season with more salt as needed (if it tastes flat, add more). If you chose to use cooked whole grains, add them now. Cover and simmer for another twenty minutes.
  7. Uncover, stir in the kale, add cayenne pepper if desired, and serve.
Notes

Veganize your “normal” food cravings with VeganGR

At VeganGR, we find that one of the stumbling blocks for many people struggling to eat a more plant-centered diet is that they feel like they are going to have to give up eating all the wonderful meals they grew up with and love. The truth is, anything can be veganized! Of course, that doesn’t mean you’re ever going to have a vegan porterhouse steak, but it’s really easy to replace certain flavors and foods in pretty much any recipe once you get the basics down. For instance, we use cashew cream in place of heavy whipping cream in recipes. Other substitutions are easier: Earth Balance butter in place of dairy butter or margarine, almond milk in place of cow’s milk, or vegetable broth in place of chicken broth. Take, for example, one night last week when Jon and I saw an ad for Olive Garden. It sparked a memory in him of having some sort of creamy potato and sausage soup from there many years ago. A quick Google search revealed it to be Zuppa Tuscano Italian Soup. We also found some copy cat recipes. A few minutes later, Jon was in the kitchen making it. Here’s the original recipe we found (from Food.com).

The ingredients:

  • 1 lb Italian sausage (I like mild sausage)
  • 2 large russet baking potatoes, sliced in half, and then in 1/4 inch slices
  • 1 large onion, chopped
  • 1/4 cup bacon bits (optional)
  • 2 garlic cloves, minced
  • 2 cups kale or 2 cups swiss chard, chopped
  • 2 (8 ounce) cans chicken broth
  • 1 quart water
  • 1 cup heavy whipping cream

This recipe is pretty simple, and super easy to veganize! We happened to have some Tofurkey Italian Sausage in the fridge, so we used that. You might already know this, but most bacon bits are accidentally vegan, just check the label and you should be good to go. We didn’t have any on hand, so we just left them out. For the chicken broth, you could just sub vegetable broth, but we’re partial to Better Than Bullion’s No-Chicken Broth. It’s a great way to replicate the chicken flavor, and color in soups. The hardest part of this (which isn’t so very hard at all) is making cashew cream in place of the whipping cream. It’s pretty simple, especially if you have a high-powered blender like a Vitamix. Soak 1 cup of cashews in water overnight, or at least for several hours (you can skip this step if you have a high-powered blender) Drain and rinse. Place them in your blender and cover with ½ inch of water. Blend on high for a few minutes until they are smooth. If you think they’re too thick, add more water. In the end, this is what our recipe looked like:

  • 1 lb Tofurkey brand Italian sausage chopped into small pieces
  • 2 large russet baking potatoes, sliced in half, and then in 1/4 inch slices
  • 1 large onion, chopped
  • 2 garlic cloves, minced
  • 2 cups kale or 2 cups swiss chard, chopped
  • 16 ounces Better Than Bullion No-Chicken broth
  • 1 quart water
  • 1 cup cashew cream

Instructions:

soup bowl with breadsticks on the side

Chop or slice uncooked sausage into small pieces. Brown sausage in your soup pot. Add vegetable broth and
water to pot and stir. Place onions, potatoes, and garlic in the pot. Cook on medium heat until potatoes are done. Salt and pepper to taste. Simmer for another 10 minutes. Turn to low heat. Add kale and cream. Heat through and serve.

Love at first juice

Amazon delivered my Breville Juice Fountain yesterday and today Mr. Wonderful and I made our first juice. Last week we watched Fat, Sick and Nearly Dead and wanted to give a juice fast a try before the holidays.

Let me first tell you how liberating making a juice is. The whole process feels good. The noise feels good. The drinking feels good. The murdering of innocent veggies, feels good!! Even the clean up even feels good! I know, I’m on some nutrient dense high or something but seriously. Good.

This first time was basically about figuring out of how to operate the thing which was surprisingly uncomplicated. Choosing the fruit/veg came via whatever was in the fridge so here is our attempt recipe:

  • 3 navel oranges
  • 3 bunches kale
  • 5 super mini apples
  • 1 C cranberries
  • 12 mini carrots

Juice ingredients one at a time, greens first. DRINK!

This made about 5- 16 ounce juices which is about a one person juice fast day.

image

Vegan “Magic Shell”

I’m a sucker for ice cream. Even in the winter. Standard operating procedure on weekends at our home is to nosh on sundaes at some point; however, due to the power outage last week, we were down all standard items less some ice cream that we bought at 1:00 am on Friday night in a fury 🙂 So what’s a girl to do? Well she makes “magic shell” from things on hand in the pantry of course. You bet. Don’t waste time, get this on some ice cream stat, yes, even in the winter.

This slideshow requires JavaScript.

Vegan Magic Shell

  • 1/2 C vegan chocolate chips (Ghirardelli are a pantry staple of ours and accidentally vegan)
  • 1 heaping T crunchy or creamy peanut butter
  • 1 T coconut oil

Melt all items in a Pyrex or other microwave save dish for 30 seconds, stir until all ingredients have melted into a delicious velvety sauce. Resist urge to dump down throat, the “magic” happens when it hits the cold ice cream. Our fave is Vanilla Island by Luna & Larry.